





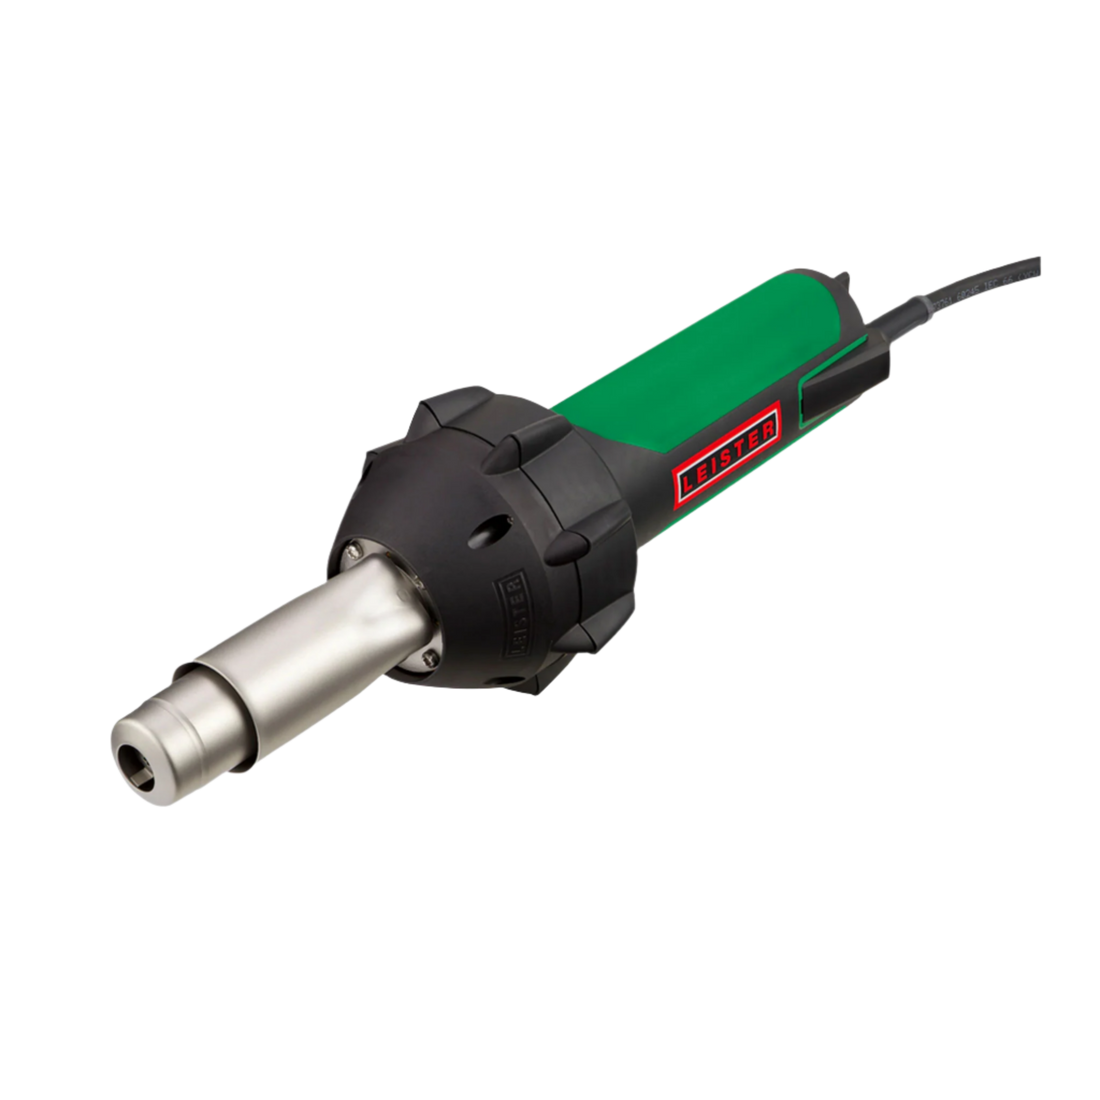


Leister Triac AT Heat Gun is a digitally controlled heat tool designed for high-precision thermoplastic welding and forming in roofing, civil containment, and fabrication environments. It features a stepless 40°C to 620°C temperature range and internal voltage regulation to maintain consistent heat output even when powered by portable site generators.
Integrated Eco-Mode and an automated 90-second cool-down cycle protect the 1600W heating element from burnout, ensuring seam integrity in HDPE geomembranes and TPO membranes despite fluctuating environmental wind or site power.
Frequently asked questions
Can the TRIAC AT be used with HDPE geomembranes on site?
Yes, the TRIAC AT is suitable for welding HDPE geomembranes. Use a setting around 580 °C with 200 l/min airflow and the correct nozzle. Always perform test welds to confirm optimal site conditions.
Does the AU model work with standard 10A site power in Australia?
Yes, the Australian TRIAC AT operates on standard 10A, 3-pin power outlets. It is rated at 230 V / 1600 W, compatible with typical Australian job site power supplies and RCD-protected circuits.
What nozzles are compatible with the TRIAC AT?
The TRIAC AT uses a ø31.5 mm nozzle connection designed for Leister accessories. This includes a range of slit, overlap, and tubular nozzles. M14 thread adapters are also available for specific legacy fittings.
How does Eco-Mode benefit site operations?
Eco-Mode reduces power consumption when the gun is idle. This feature lowers the element temperature, protecting the heating coil and extending the tool's service life without slowing down restart performance.
Is the TRIAC AT designed for continuous operation?
Yes, the TRIAC AT is engineered for continuous-duty use. Its built-in cool-down cycle and temperature stabilisation features ensure consistent performance for demanding tasks such as roofing and geomembrane welding.
Applications and benefits
| Application | Key benefit | Primary trades |
|---|---|---|
| Roof membrane welding (TPO, PVC) | Digitally controlled heat ensures seam integrity in variable wind and temperature conditions. | Roofers, Waterproofers |
| HDPE/LDPE liner installation for ponds, bunds | Voltage-stable performance supports reliable field use with portable power sources. | Civil Contractors, Environmental Installers |
| Plastic sheet bending and thermoforming | Stepless temperature and airflow avoid material warping and cracking during shaping. | Plastic Fabricators, Signmakers |
| Vinyl flooring edge detail welding | Compact nozzle and ergonomic grip allow access to corners and confined spaces. | Flooring Installers |
| Canvas and tarpaulin repair | High heat output supports fast adhesion of coated fabrics with appropriate slit nozzles. | Awning Specialists, Tent & Tarp Repair |
Applying Leister TRIAC AT Heat Gun: Enhanced Protocols & Best Practices
-
Step 1: Pre-Operational Check & Setup
Verify that the power source is stable and protected by an RCD. Attach the appropriate nozzle securely to the ø31.5 mm fitting. Ensure the airflow intake is unobstructed.
Method 1: Jobsite Use
Use a heavy-duty 10A-rated extension lead. Position the gun where it will not be knocked or overheated while idle. Ensure the digital screen and e-Drive interface are functional before activating heat.
Method 2: Fabrication Bench
Mount the TRIAC AT using a heat gun holder. Secure the workpiece and orient ventilation to avoid buildup of hot air in enclosed spaces.
Timing: Setup and power check: 2–3 minutesPro Tip: Use a dedicated 10A power line and avoid generator loads that fluctuate above ±10 V for consistent performance. -
Step 2: Setting Temperature & Airflow
Use the e-Drive control knob to adjust temperature and airflow to suit the substrate and application method.
Membrane Welding (TPO/PVC)
Set temperature to approx. 520 °C and airflow to 180 l/min for typical 1.5 mm roofing membranes. Adjust based on ambient temperature and material thickness.
Plastic Sheet Forming
For acrylic or polycarbonate, use lower settings (e.g., 370–400 °C, low airflow) to prevent scorching. Preheat gradually and maintain distance.
Timing: Heating element reaches target temp in 30–60 secondsPro Tip: Use consistent nozzle-to-surface distance and cross-check material temperature with a digital IR thermometer. -
Step 3: Active Welding or Forming
Apply steady movement with the gun and use compatible tools (e.g., Leister rollers) to maintain weld pressure or shape retention.
Overlap Seam Welding
Angle the nozzle into the seam, preheat until material softens, and immediately follow with roller pressure. Maintain a steady travel speed.
Thermoforming Curves
Clamp material over a forming jig. Use slow sweeping passes and allow the sheet to relax into shape. Do not force the bend under cold conditions.
Timing: Most welds take 5–10 seconds per 300 mm depending on material typePro Tip: Do not linger with the nozzle — overheating causes bubbling and weak joints. Use test scraps to fine-tune technique. -
Step 4: Post-Weld Handling & Shut-Down
Turn off the heating element but leave the fan running. The TRIAC AT will automatically enter cool-down mode. Wait until the tool is safe to touch before storage.
On-Site Cooling
Lay the gun on a heat-resistant surface and allow the internal fan to cool the element for 60–90 seconds before unplugging.
Workshop Shutdown
Return settings to zero. Clean the nozzle with a soft brush to remove buildup. Store in a padded, dry tool case.
Timing: Cooling process: 60–90 seconds after switch-offPro Tip: Never unplug while hot — allow cool-down to complete to prevent element damage and fire risk.
Product limitations
- Not for: Non-thermoplastic materials such as metal, timber, or composites. This tool is designed strictly for thermoplastic welding and forming.
- Not for: Use in explosive or flammable environments. The heating element can ignite vapours or dust in confined spaces.
- Circuit requirements: Operates on 230 V, 10A circuits. Do not connect to under-rated extension cords or outlets. May trip RCDs if the circuit is overloaded.
Safety and handling
Personal protective equipment
Wear heat-resistant gloves when handling nozzles or hot materials. Safety glasses or goggles are recommended during overhead or vertical work. Avoid loose clothing near airflow vents.
Ventilation
Ensure adequate airflow in enclosed or poorly ventilated areas. When welding PVC, always ventilate to prevent exposure to harmful off-gassing at high temperatures.
First aid
- Eyes: Flush with cool water for at least 15 minutes. Seek medical attention immediately.
- Skin: For contact burns, rinse with cool water. Do not apply ointment to severe burns—cover with a sterile cloth and seek urgent care.
- Inhaled: Move to fresh air. Monitor for respiratory distress. If symptoms persist, consult a doctor immediately.
Storage and disposal
Never leave the tool unattended while hot. Avoid resting the hot nozzle on combustible surfaces. Use only on non-flammable benches or dedicated holders when not in use. Dispose of worn tools according to local regulations for electrical waste.
Substrate guide
Using the correct preparation and temperature setting is critical for reliable plastic welding and forming.
PVC (Polyvinyl Chloride)
Surface prep: Ensure the surface is clean and dry. Wipe with a dry cloth; avoid any moisture.
Primer: Not required. Weld directly to the material. Target 500–580 °C with medium airflow using a suitable nozzle.
TPO (Thermoplastic Polyolefin)
Surface prep: Preclean surfaces with isopropyl alcohol to remove contaminants.
Primer: Not required. Weld directly using an overlap nozzle with consistent pressure. Target 520–600 °C depending on sheet thickness.
HDPE / LDPE (Polyethylene)
Surface prep: Clean with an abrasive cloth, then dry wipe to remove dust and debris. Avoid moisture.
Primer: Not required. Must use a matched HDPE welding rod if joining edges. Target 560–620 °C with high airflow.
Acrylic / Polycarbonate
Surface prep: Gently clean with an alcohol-based antistatic cleaner to prevent static buildup and dust attraction.
Primer: Not required. Use for forming only, not welding. Apply low heat at 360–400 °C to prevent material crazing or bubbling.
Leister Triac AT Heat Gun Physical Properties
| Property | Value |
|---|---|
| Voltage | 230 V |
| Power | 1600 W |
| Frequency | 50/60 Hz |
| Temperature Range | 40–620 °C |
| Temperature Setting | Stepless |
| Airflow | 120–240 l/min |
| Air Volume Adjustment | Stepless |
| Static Pressure | 3000 Pa |
| Eco Mode | Yes |
| Display | Digital e-Drive |
| Outdoor Use | Yes |
| Nozzle Connection | ø31.5 mm, M14 thread |
| Length | 335 mm |
| Device Diameter | 90 mm |
| Handle Diameter | 56 mm |
| Weight | 1.02 kg |
| Power Cable Length | 3.0 m |
| Noise Emission Level | 67 dB(A) |
| Protection Class | II |
| Plug Type | AU, 3-pin, 10A |
| Approvals | CE, S+ |
| Country of Origin | Switzerland |